

This is how you remove eduroam from your macOS 13 (Ventura) or 14 (Sonoma) device:
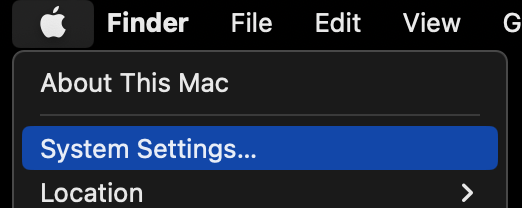
Click on the Apple icon up left and then System Settings...
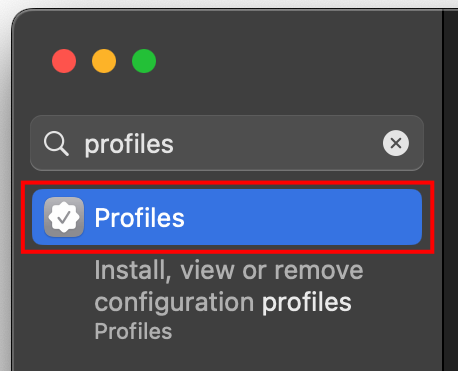
Enter Profiles into the search field (up left) of the System Settings window.
Below the field, there should be an entry called Profiles. Click it.
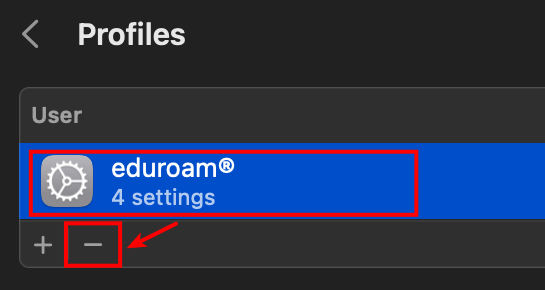
In the list of installed Profiles, select the eduroam profile and click the Minus (-) symbol.
In case there are multiple eduroam profiles present, please remove them all.
If you cannot find any eduroam profiles, jump to step 5.
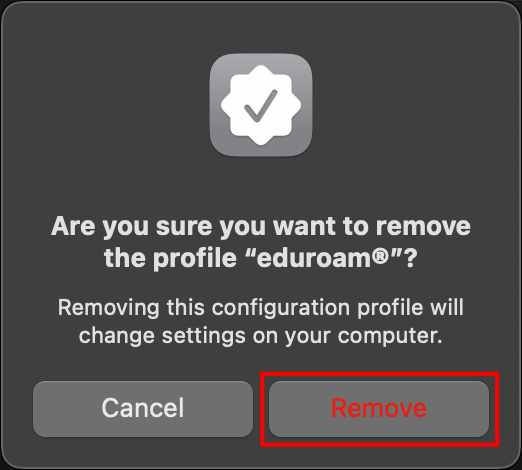
Confirm by clicking Remove. You might have to enter the password of your Mac (not of your university user account).
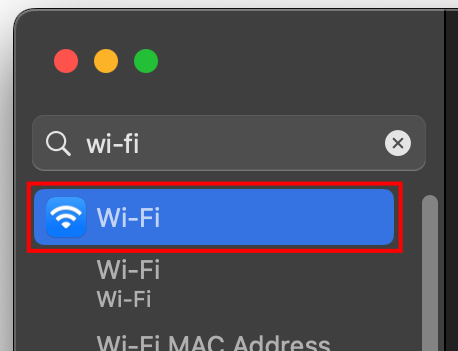
Now, go back to the System Settings window and enter Wi-Fi into the search field and click the Wi-Fi entry that appears below.
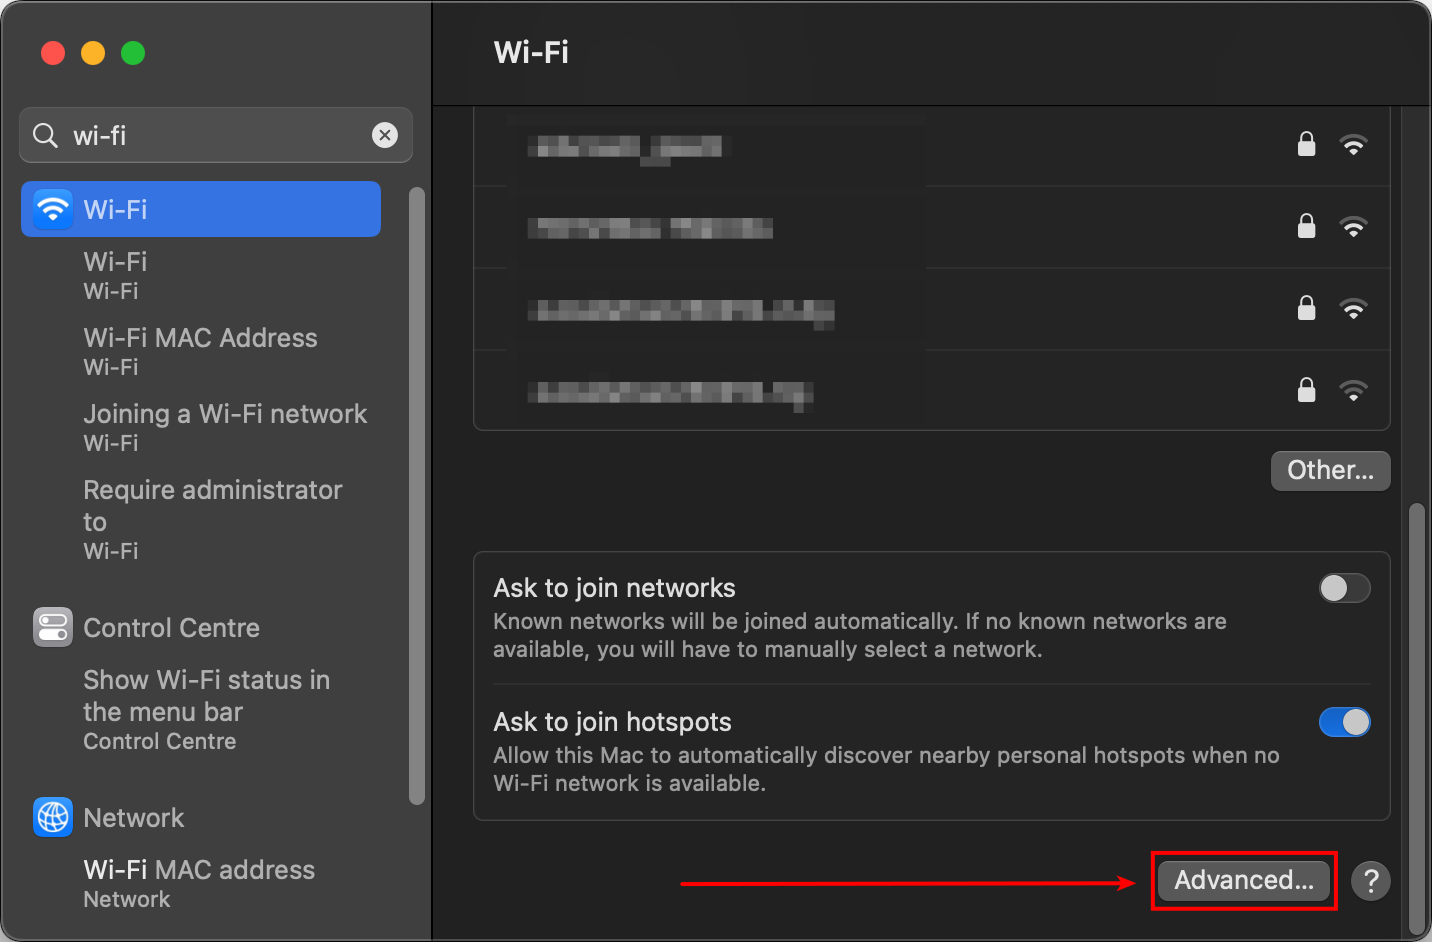
In the right part of the window, scroll all the way down and click Advanced....
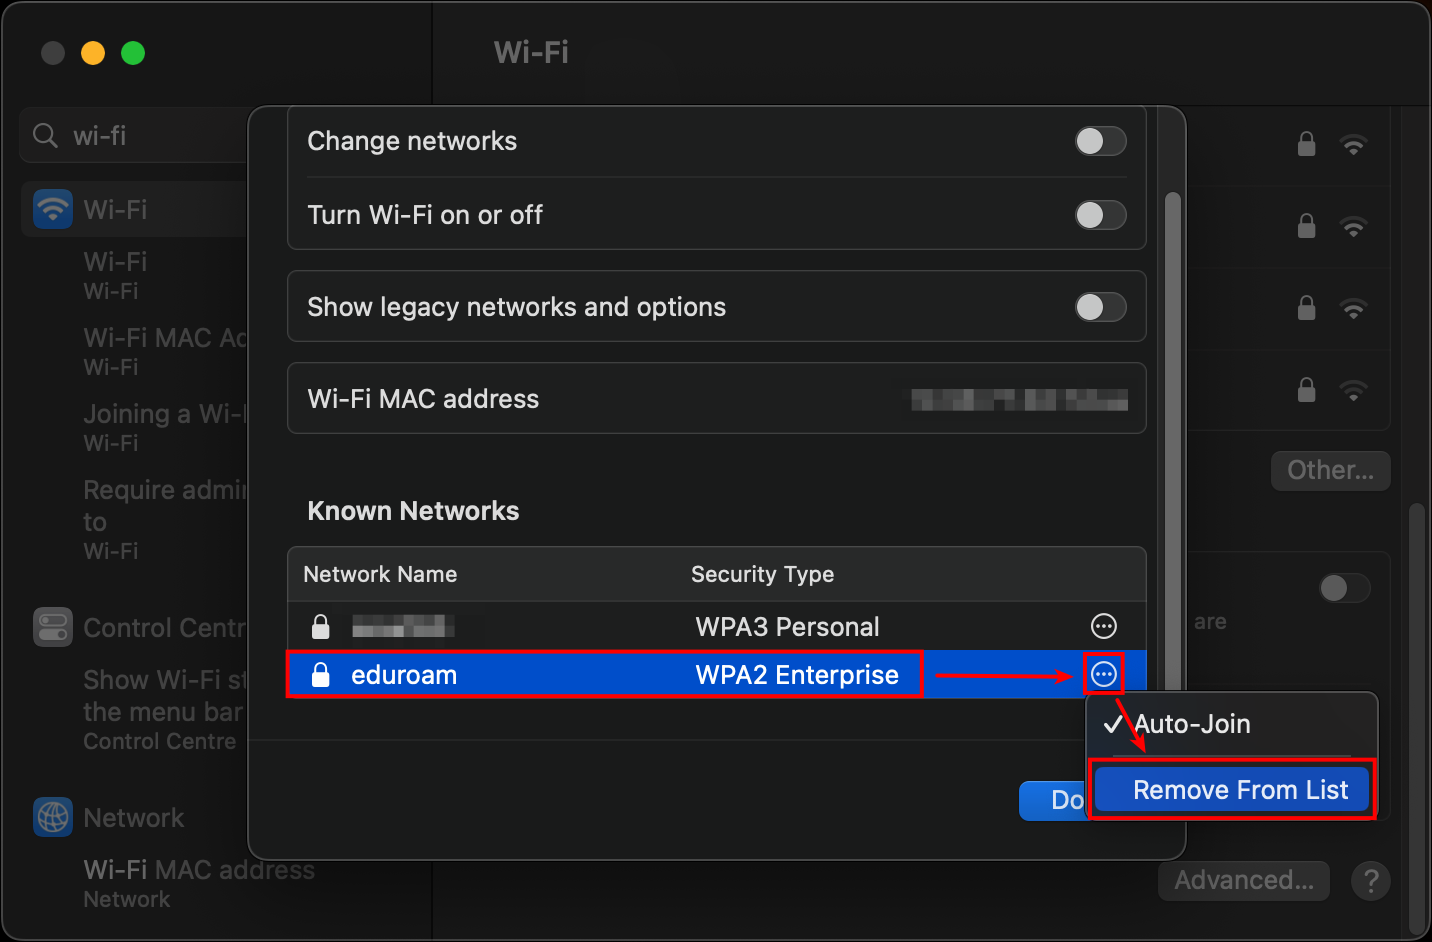
Under Known Networks, search for eduroam entries. Remove them by clicking the Three dots symbol and afterwards Remove From List.
After that, click Done.
Note: This list is usually not sorted alphabetically, but by network priority.
If you cannot find any eduroam networks, skip this step.
That's it! You have successfully removed the eduroam network from your device.
If you want to connect to it again, please follow our instructions for setup (click here)!